
Most phone-shot UGC fails for simple reasons: bad light, weak sound, shaky framing, a messy background, or a slow opening. If I fix those first, my videos look better, feel more natural in-feed, and are less likely to get sent back.
Here’s the short version:
- I clean my lens and lock focus/exposure before every take.
- I use window light or a basic ring light instead of dim room lighting.
- I keep my phone steady with a tripod, mount, or a simple DIY setup.
- I frame for 9:16 vertical and leave space for app buttons and captions.
- I pick a plain background that fits the product.
- I make audio clean, because poor sound can lose viewers fast.
- I plan a hook for the first few seconds, since 65% of people who watch the first 3 seconds keep watching for at least 10 seconds.
- I show the product in use with extra angles and short B-roll clips.
- I keep edits light and avoid filters, beauty mode, and heavy effects.
- I check the brief and record a short test clip before filming the full version.
One more point matters: about 9 in 10 consumers trust content from other people more than brand ads. That edge disappears fast when the video looks soft, sounds echoey, or misses the brief.
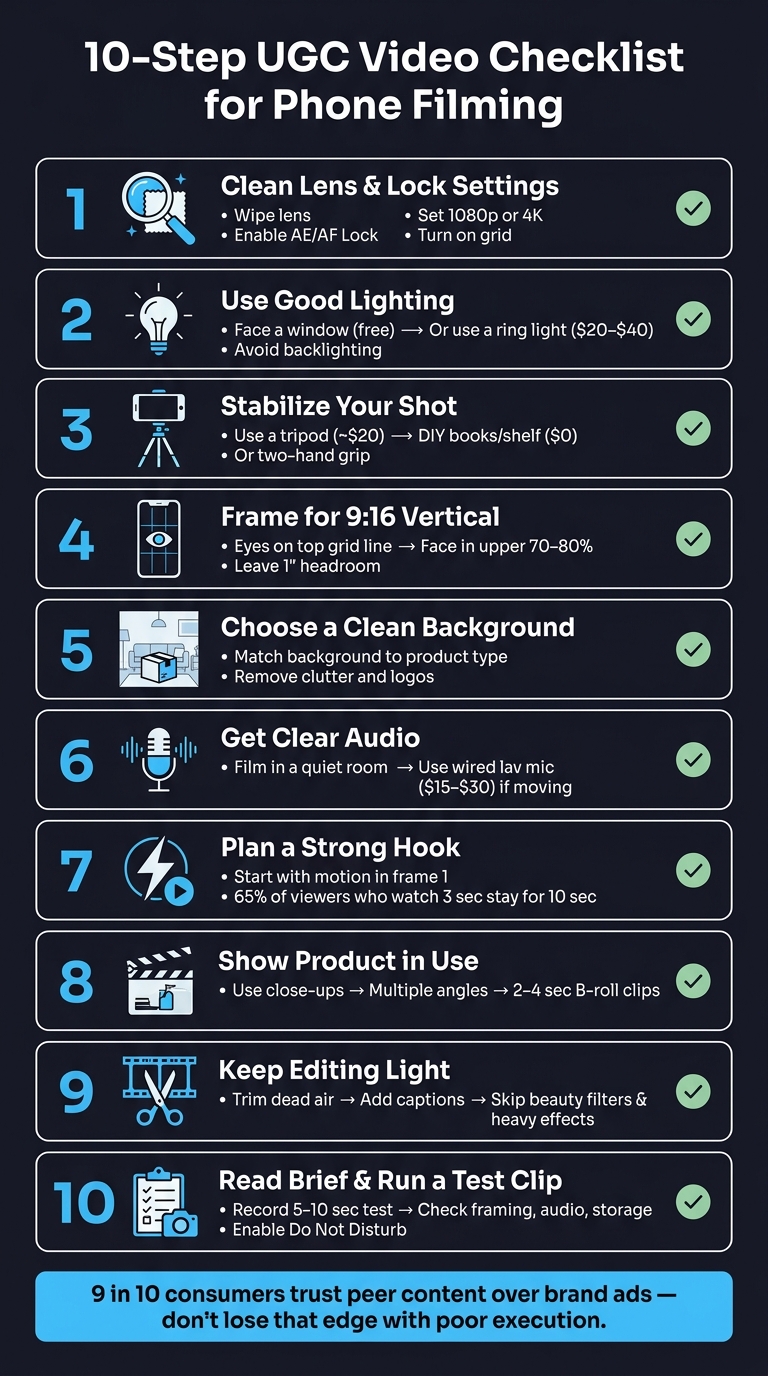
10-Step UGC Video Checklist for Phone Filming
UGC Filming Tips for Beginners | How to Create High-Quality UGC That Brands Love
sbb-itb-1e69e94Quick Comparison
| Tip | Main Fix | Why I Do It |
|---|---|---|
| Clean lens and settings | Wipe lens, lock AE/AF, set 1080p or 4K | Stops soft footage and brightness shifts |
| Better light | Face a window or use a ring light | Makes face and product look clearer |
| Steady setup | Tripod, mount, or DIY support | Cuts shake that makes video hard to watch |
| Vertical framing | Shoot in 9:16 and avoid UI overlap | Keeps face, product, and text visible |
| Simple background | Remove clutter and match the setting to the product | Keeps attention on the item |
| Clear audio | Quiet room or lav mic | Helps viewers stay with the video |
| Strong hook | Start with motion and a direct line | Holds attention early |
| Product demo | Use close-ups and short B-roll | Shows proof instead of just telling |
| Light editing | Trim, caption, and keep effects low | Helps the video feel native to the feed |
| Brief + test clip | Check rules and record 5–10 seconds first | Catches issues before a full reshoot |
If I want better UGC on my phone, I don’t need fancy gear. I need a repeatable setup, a short checklist, and clean execution.
What Makes Phone-Shot UGC Actually Convert
Better gear doesn't mean better UGC. What drives conversions is clarity, watchability, and natural delivery - not a polished, cinematic look. In fact, content that feels too produced can hurt performance.
The base is pretty simple: lighting, framing, audio, stability, product visibility, and concise delivery. Those six basics shape everything that follows, and the next 10 tips build on them one at a time.
Roughly 9 in 10 consumers trust content from other people over brand ads. That's a huge edge, but it's easy to lose. The goal is to sound like a friend making a recommendation, while still keeping the video clean on a technical level.
Out of those six pillars, audio is the harshest filter. People will put up with an image that's a little soft, but echoey or muffled sound can kill trust fast. Lighting has the biggest impact on how the video looks, because bad light can make the product seem unappealing before the creator even says a word.
Concise delivery helps keep attention. Most edits should land between 15 and 45 seconds. And 65% of people who watch the first 3 seconds of a video will watch at least 10 seconds, which is why the opening matters so much. Tip 1 starts with one of the easiest fixes out there: a clean lens and the right camera settings.
1. Clean Your Phone Lens and Set Basic Camera Settings
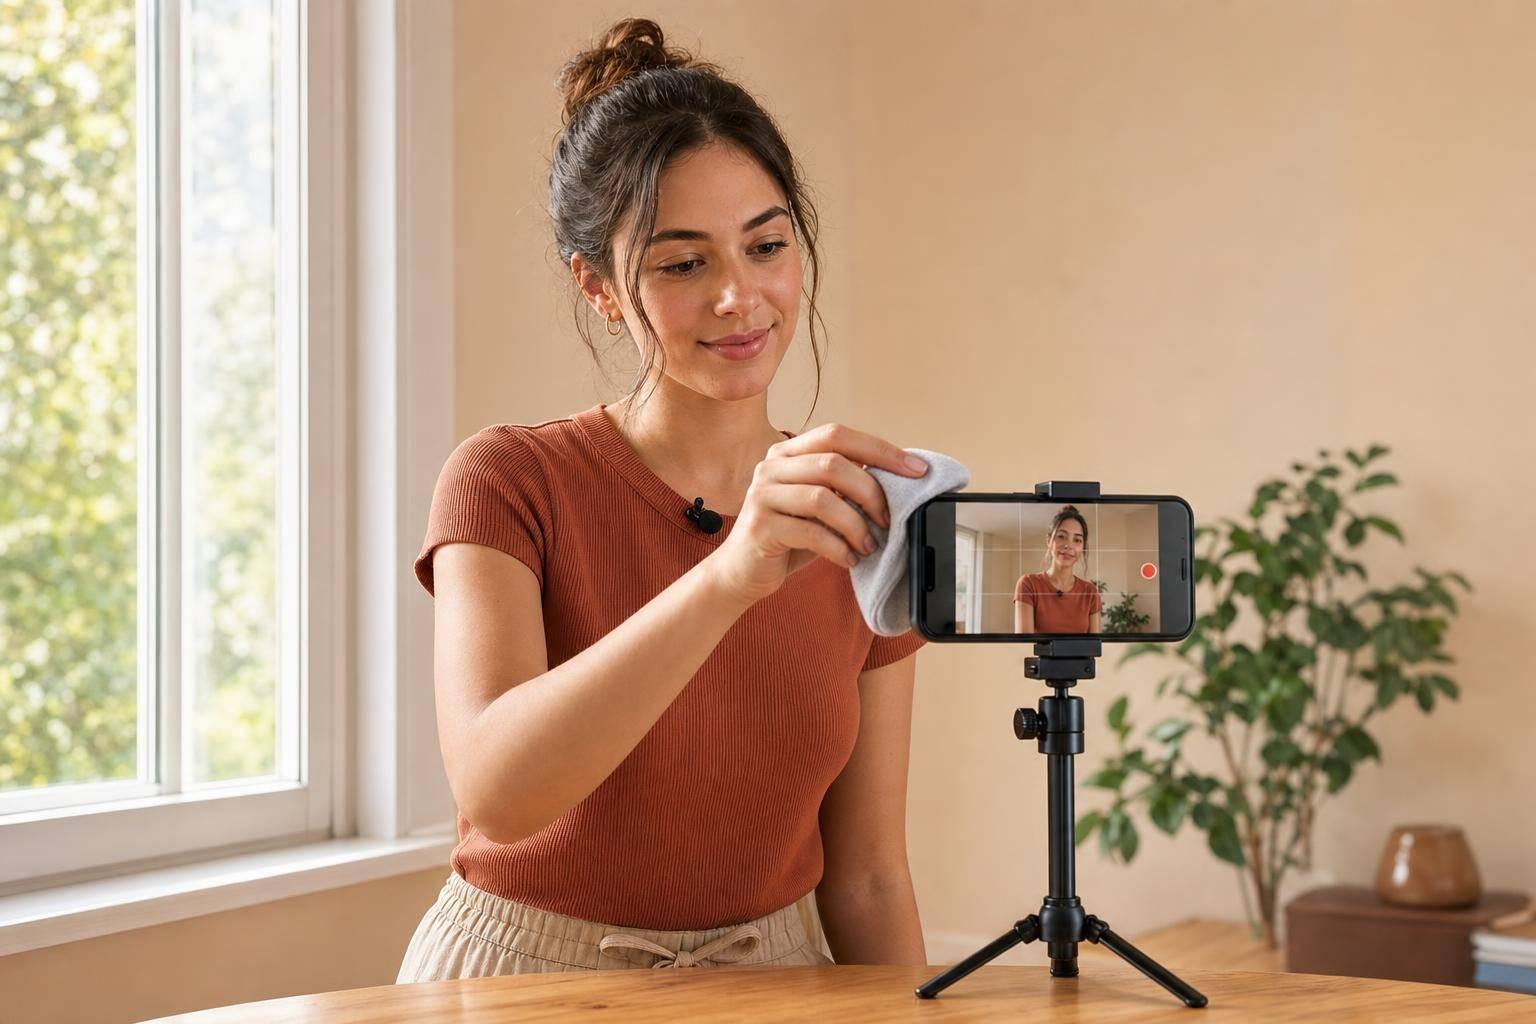
First, clean the lens and lock exposure. It sounds almost too simple, but one fingerprint can make footage look soft and cheap. A microfiber cloth works best, but a soft T-shirt will do the job if that's what you have.
Then tap and hold on your subject until AE/AF Lock shows up. This matters more than people think. If you skip it, your phone may keep shifting brightness in the middle of a take, especially if a cloud passes by or you move a little.
Keep your camera settings simple:
- Use 4K if you want extra room to crop later. Use 1080p if you want smaller file sizes.
- Use 24 fps or 30 fps for talking-head clips. Save 60 fps for slow-motion B-roll.
- On iPhone, use the more compatible H.264 format to avoid upload problems.
- Turn on the 3x3 grid so your frame stays level and your eyes sit in the top third.
- Turn off HDR unless the brief asks for it.
- Skip digital zoom. Move closer instead.
- Turn on Do Not Disturb so notifications don't ruin the take.
It's also smart to use your phone's native camera app. You usually get better bitrate and more control that way. Heavily compressed footage can make paid ad cuts unusable.
Once these camera basics are set, lighting is the next big step up.
2. Use Natural Window Light or a Simple Ring Light
Good lighting is one of the biggest upgrades you can make to phone-shot UGC, and if you have a window, it can cost $0. It helps skin tones look right and makes the product easier to believe in.
For window light, face the window and stand about 3 to 6 feet away. Overcast light works best because it softens shadows. Keep the window in front of you, not behind you. If the window is behind you, your face can turn into a dark silhouette. It also helps to turn off overhead lights so you don't mix color temperatures and end up with skin that looks off.
If one side of your face looks too dark, use something white on that side to bounce light back. A foam board, a white T-shirt, or even a blank wall can do the job.
If daylight is weak, switch to a ring light. This makes sense at night or during dark winter days. Place it slightly above eye level and tilt it downward. Don't bring it too close. If you do, you'll get hot spots or harsh shadows.
| Natural Window Light | Ring Light | |
|---|---|---|
| Cost | Free | $20–$40 |
| Best time to use | Daytime shoots | Evenings, nighttime, or dark winters |
| Look | Soft, natural, and believable | Steady and controlled |
| Main drawback | Depends on weather and time of day | Can look fake if it's too bright or too close |
No matter which light you use, test it before recording the full take. Record a 5-second clip and turn your head slightly left and right. Then fix any harsh shadows or shine by changing your distance or angle before you start the full recording.
3. Stabilize Your Phone With a Tripod, Mount, or DIY Setup
Once your lighting looks good, keep the shot still. Shaky footage is one of the main reasons brands reject UGC before they even look at the script. Stable video holds attention longer and makes the product feel more trustworthy.
The good news: you don’t need pricey gear. For static talking-head shots, books, a mug, or the edge of a shelf can do the job. If you want a bit more range, a Joby GorillaPod or a similar flexible mini tripod costs about $20. It works well for product demos and different camera angles. Set your phone at eye level or slightly above. Shooting from below eye level tends to make the content look amateurish.
If you’re filming moving shots, keep it simple and move slowly. When shooting handheld, hold the phone with both hands, tuck your elbows into your ribcage, and let out a slow exhale before you hit record. It’s a small trick, but it helps steady your body and cuts those tiny shakes that often show up right at the start of a clip. A little handheld sway is fine. It can feel human and intentional. The bigger problem is jerky, lurching movement that makes the video hard to watch.
Built-in phone stabilization can help as a backup, but it has limits. On some devices, it can crop your frame by as much as 20% and make motion look unnatural if you move too fast.
| Stabilization Method | Cost | Best For |
|---|---|---|
| DIY (books, mugs, shelf edge) | $0 | Static talking-head shots |
| Two-hand grip with tucked elbows | $0 | Human-feeling handheld movement |
| Flexible mini tripod (e.g., Joby GorillaPod) | ~$20 | Different angles and product demos |
| Built-in phone stabilization | Built-in | Backup only; watch for frame crop |
4. Frame Your Shot for Vertical Feeds and On-Screen UI
Once the phone is stable, frame for the feed, not just the camera. Shoot in 9:16 vertical format for TikTok, Reels, and Shorts.
Then protect the frame from platform UI. Keep your face and product in the upper two-thirds of the screen. On TikTok Shop, captions, usernames, and buttons often sit in the bottom third. If you're filming a talking-head clip, place your eyes on the top horizontal grid line. Your face and upper body should take up about 70–80% of the frame.
Leave about 1 inch between the top of your head and the top of the frame. Too much headroom makes you look far away. Too little can feel boxed in.
Use the grid to place the product on an intersection point instead of dead center. Before the final take, record a short test clip and check that no UI covers your face, product, or on-screen text.
| Framing Element | Recommended Placement | Why It Matters |
|---|---|---|
| Eyes | Upper horizontal grid line | Creates a natural eye line |
| Face/Subject | Upper two-thirds of frame | Stays clear of captions and UI overlays |
| Headroom | About 1 inch from top | Avoids a cramped or distant look |
| Product | Grid intersection points | Looks deliberate, not centered |
| Text/Captions | Center or slightly above bottom UI | Stays readable on all screen sizes |
5. Choose a Simple, Clean Background That Supports the Product
Once your framing is set, clean up the space behind the product. The background should support what you're showing, not steal attention from it. Before you record, take a quick look at the frame and remove anything distracting, like mirrors, laundry, random bottles, or visible brand logos. The goal is simple: keep the product front and center.
Your background should also fit the type of product you're filming. A good match makes the scene feel natural right away.
| Product Category | Recommended Background | Why It Works |
|---|---|---|
| Skincare/Beauty | Bathroom vanity or tidy shelf | Suggests a personal daily routine |
| Food/Supplements | Clean kitchen counter | Places the product in a natural setting |
| Tech/Gadgets | Tidy desk corner or plain wall | Feels organized and practical |
| Lifestyle/Apparel | Bedroom with soft bedding or fabric or a clean wall | Feels intimate and natural |
| Small Products | Foam poster board | Creates a clean, studio-style look for about $10 |
A skincare demo on a tidy bathroom vanity just makes sense. Put that same product on a cluttered desk, and the whole shot can feel off. Small setup choices like this shape how the product comes across.
For close-ups, a foam poster board in white, black, or a soft pastel is a simple fix. It gives you a clean backdrop, and if you curve it at the base, you get that smooth, seamless look. If you're filming in front of a wall, don't stand right up against it. Step back about 1–2 feet instead. That little bit of distance adds depth and helps the frame feel less cramped.
It also helps to use the same filming corner each time. That way, your videos look consistent from one shoot to the next. Once the scene is clean, clear audio becomes the next trust signal.
6. Get Clear Audio With Your Phone Mic or a Clip-On Mic
Once your shot looks clean, audio becomes the next big trust signal. Bad sound can lose people fast, often faster than less-than-perfect video. So before you hit record, make clean audio the priority.
Your phone’s built-in mic usually works well when you’re about 18–24 inches from the phone. Keep the room as quiet as you can. Turn off AC, fans, heaters, and loud appliances. Close doors and windows too. Then do a short silent test before filming and listen back with headphones. That makes it easier to spot hums, echo, or traffic noise.
If your phone is staying in one place, the built-in mic is often enough. If you’re moving around, it’s worth stepping up your setup. A basic wired lav mic usually costs about $15–$30 and helps keep your voice steady and direct. Clip it around chest level or near your collar. Just make sure the cable isn’t rubbing against your shirt, or you may get that scratchy shirt noise.
| Audio Setup | Cost | Best For |
|---|---|---|
| Phone mic | Free | Close-up talking heads at arm's length |
| Wired lav mic | ~$15–$30 | Most UGC; direct, consistent sound |
| Wireless lav mic | ~$50+ | Movement-heavy demos and unboxings |
| Voiceover | Free | Noisy environments or complex product actions |
If the room is still too loud, shoot the visuals first and record the voiceover later in a quiet spot. A bedroom or walk-in closet can work surprisingly well. Then you’re set to focus on the opening few seconds, where the hook has to do its job.
7. Plan and Deliver a Strong Hook in the First Few Seconds
Once the shot is steady, the hook needs to win the next few seconds. A phone-shot UGC hook should feel native to the feed, clear, and instant, not like an ad that’s been polished until all the life is gone. People decide fast whether to keep watching, so the opening does most of the heavy lifting. Start with a simple visual action before you fine-tune the exact line.
A strong hook works on two levels: visual and verbal. In the first frame, show movement. Open the package, hold up the product, or point to on-screen text so something is happening right away. The first frame and any text on screen should still make sense with the sound off, because plenty of people scroll in silence. Once that visual piece works, match the spoken line to it.
On the verbal side, write the hook the way you’d say it to a friend. Lines like "I didn't expect this to work, but it actually did" or "Wait... why did no one tell me this?" sound natural and honest. One simple format that works well is PAS: start with a specific problem, push on why it’s annoying for a moment, then bring in the product as the fix. Skip ad-speak that feels rehearsed.
For the actual delivery, keep it loose:
- Jot down the key beats first, then let the wording sound natural when you say it
- Record three takes: one loose, one punchy, and one fast
- Cut the dead air at the beginning so the video starts on the first word
8. Show the Product in Use With Multiple Angles and B-Roll
Once the hook works, back it up with extra angles. Don’t just talk about the product - show it doing the job. That helps people trust what they’re seeing fast. A simple setup is enough: a chest-up intro, a hands-only demo, and a real-life result shot.
For close-ups, pause on the front and back labels for 3–5 seconds so viewers have time to read the packaging and confirm what they’re buying. Then move into the main action: pouring, clicking, applying, or opening. Slow your hands down more than you think you need to. On a phone screen, fast motion usually looks blurry.
If you’re filming motion that people need to see clearly - like a pour, spray, or texture reveal - shoot at 60 fps and slow it to 50% in the edit. That little change can make the product look much clearer.
Extra B-roll also gives the brand more footage to work with and cuts down on reshoots. Film all of it in the same lighting session as your talking-head shots so the final video looks consistent from cut to cut.
Keep B-roll clips short, around 2–4 seconds. Once you have the footage, keep the edit simple and native.
9. Use Native Phone Features and Keep Editing Simple
Start with your phone’s built-in camera settings, then keep the edit light. Shooting inside TikTok or Instagram usually means lower bitrates and less control over the final file. And that matters. Clean footage helps the product feel believable in-feed.
If you’re using an iPhone, set it to Most Compatible (H.264) so brand editors can open the files without compatibility problems. Turn HDR off unless the brief asks for it. HDR footage can look washed out on the standard monitors most editors use. Once your capture settings are clean, the edit should feel just as natural.
Skip beauty mode and filters. They bake the effect into the file, and that can hurt credibility.
Leave grid lines on. Use AE/AF Lock so focus and exposure don’t drift mid-shot.
After you record, make only the cuts the video needs. Trim dead air, cut filler words, add captions, and stick to subtle punch-ins. Heavy effects pull the video away from the native look that makes UGC work. At that point, the final cut can feel overproduced instead of trustworthy.
| Feature | Recommended Setting | Why It Matters |
|---|---|---|
| File Format | H.264 (Most Compatible) | Works across editing software and brand workflows without compatibility issues |
| HDR Video | Off | Helps avoid color and brightness problems on standard screens |
| Beauty Filters | Off | Keeps footage credible and natural-looking |
10. Read the Brief Carefully and Run a Test Clip First
Once your shoot setup is locked, do one last preflight before you record the first full take. Read the brief closely and check the format, file specs, hook, shot list, and any no-go rules. If the brief says to use a certain CTA or show the product in the first few seconds, you need to catch that before you frame the shot.
Next, record a 5- to 10-second test clip. Then play it back with headphones. Listen for hum or echo, and look for framing, focus, or lighting problems. A short test clip can also help you spot fingerprints on the lens, AE/AF drift, or messy background clutter. Those are easy fixes when you catch them early. Miss them, and you're looking at a frustrating reshoot.
Before you start full takes, check two simple things:
- Storage: 4K files fill up phones fast and can stop a shoot mid-take.
- Do Not Disturb: One notification is all it takes to ruin an otherwise clean clip.
Use the test clip to catch the problems below before they burn time.
| Issue Caught in Test Clip | Fast Fix |
|---|---|
| Brief violation | Re-read the shot list and no-go rules before the first full take |
| Notification interruption | Enable Do Not Disturb before recording |
| Storage cutoff mid-take | Free up space or offload files before shooting 4K |
Quick-Reference Tables
Use these tables to choose the simplest setup that matches your brief. If something still looks a little off after that, the next section gets into the mistakes that usually cause the problem.
Lighting
| Option | Cost (USD) | Best Use Case | Best For |
|---|---|---|---|
| Natural Window Light | $0 | Daytime filming, facing a window | Skincare, apparel, food, lifestyle |
| Ring Light | $20–$40 | Night shoots, dark rooms, consistent indoor light | Beauty, makeup tutorials, skincare |
Stabilization
| Option | Cost (USD) | Portability | Best Use Case |
|---|---|---|---|
| DIY (books, mugs) | $0 | Low | Static talking heads, zero-budget shoots |
| Mini Tripod | ~$20 | High | Talking heads, unboxings, product demos |
| Clamp/Flexible Mount | $10–$20 | Very High | Unusual angles, shelf or counter mounts |
Audio
| Option | Cost (USD) | Best Use Case |
|---|---|---|
| Built-in Phone Mic | $0 | Quiet rooms, close-range talking heads |
| Wired Clip-on Lav Mic | $20–$50 | Movement shots, noisy or echoey rooms, product demos |
Backgrounds
| Background Type | Cost (USD) | Best Use Case | Best For |
|---|---|---|---|
| Plain wall | $0 | Lifestyle context, talking heads | Apparel, home services, apps |
| Foam poster board | ~$10 | Clean flat-lays, product reveals | Supplements, small gadgets, jewelry |
| Marble contact paper | ~$12 | Textured surface shots, premium feel | Skincare, food, beauty accessories |
| Real room context | $0 | Real-world proof, daily-use shots | Food, home goods, cleaning products |
Common Filming Mistakes to Avoid
Use this as your last check before you hit record on the first full take. These mistakes damage the same conversion signals UGC relies on: trust, clarity, and a native look.
A dirty lens or poor lighting can make footage look soft and cheap. Wipe the lens before every shoot, and don’t stand with a bright window or light behind you.
Echo, background noise, and shaky framing can kill trust fast.
Some technical mistakes are easy to overlook. Don’t use digital zoom. Lock exposure and focus before each take so your image doesn’t shift mid-shot.
You also need to match the brief exactly. That includes required shots, the first-3-seconds hook, disclosure language, claims, and audio rules. If the video is going to run as a paid ad, don’t use copyrighted trending audio.
Use the table below to spot the issues most likely to lead to a reshoot.
| Mistake | Why It Hurts | Quick Fix |
|---|---|---|
| Digital zoom | Pixelated footage | Move closer instead |
| Backlighting | Dark silhouette | Face the light source |
| No AE/AF Lock | Exposure and focus drift | Tap and hold until "Lock" appears |
| Echoey room | Hollow, low-trust audio | Film in a soft room with rugs and curtains |
| Copyrighted trending audio | Unusable in paid ads | Use royalty-free or original audio |
| Missing required shot | Fails brief requirements | Use a talking head, close-up, and lifestyle shot |
Conclusion
Better UGC usually comes down to a few basics you can repeat every time: a clean lens, good light, steady framing, and clear audio. In many cases, a simple phone setup feels more trustworthy than something polished to the point of looking staged. That's a big deal when you want each shoot to feel consistent.
Next, make the process easier on yourself. Choose one filming corner and use it every time: the same window, the same framing, and the same background. That cuts out setup choices and lets you stay focused on how you deliver the message.
Apply the tips in this order: lighting, then audio, then framing. Small fixes stack up when you follow the same workflow again and again.
The goal isn't cinematic. It's consistent, trustworthy, and native to the feed. Your phone already has what you need.
FAQs
What phone settings should I use for UGC?
Use your phone’s native camera app. It gives you better image quality and more control while you shoot.
Set 1080p for most videos. Go with 4K if you want extra space to crop later. Use 24fps for talking-head videos. Switch to 60fps for product demos or b-roll.
Always shoot in 9:16 vertical. Before you hit record, lock exposure and focus. Turn on grid lines and native stabilization too. And skip digital zoom. If you need a tighter shot, just move closer.
Do I need a mic or tripod to make good UGC?
You don’t need a dedicated tripod to make good UGC. But it does help keep your framing steady and your shots consistent.
For static shots, just prop your phone against something stable, like books, a mug, or a shelf. If you’re filming handheld, tuck your elbows into your sides and plant your feet firmly to cut down on shake.
How long should a phone-shot UGC video be?
A phone-shot UGC video will usually land in the 15–60 second range.
Here’s the usual breakdown:
- 15 seconds for a hook-only video
- 30 seconds for a PAS talking-head video
- 45–60 seconds for a longer tutorial or unboxing
Most brands don’t ask for more than 90 seconds. And if the brief gives you a target length, stick close to it. A few seconds over or under is often fine, but don’t drift too far.
The first two seconds matter most. If you don’t grab attention right away, people scroll. It’s that simple.